Archive | Education RSS feed for this section

Fake Ninja Fights Make Life Better

26 Jan

I haven’t written in months. I got busy. I got wimpy. I just stopped. 

Part of the pause in writing was motivated by an all school assembly that discouraged staff from blogging about anything school related. I don’t think that conversation was directed at me or my blog, but I subconsciously took it in and the next thing I knew months had passed without writing.

So much has happened between then and now, which is another reason I think I got stuck. I felt like I was supposed to catch up, and the problem with thinking that way is that it made coming back to the blog too daunting and overwhelming of a task. So I kept putting it off.  I knew I just needed to write. Anything. But I was stuck.

Then, something finally happened to get me to sit down and write again. It’s nothing amazing. Sharing it won’t close any opportunity gaps or raise any AYPs, but it may someday prevent another teacher from a bad day battling the classroom blues, and so it seems as perfect a reason as any to get out of my writing funk. So here goes…

The boys robotics team showed up to the last meeting of the season and right away two of the remaining five team members announced that they would not be able to come to the event on Saturday. (This is the event that they have known about since September. The one that their parents signed forms for agreeing to make sure their children would attend. The one that for which we have literally been preparing for about for 5 months.) On top of that news, a few of the boys showed up in complete “baggage-heavy” mode with sad faces and slumped shoulders totally unable to “leave it at the door”. It was just one of those teacher moments when you are tired and defeated and you feel like no matter what you do it will never be enough. You know? It was too much for me and too much for them. We all just looked at each other… deflated.

I then wasted a good five minutes on“blah blah blah responsibility blah teamwork blah” which I’m sure sounded alot like “Wahwahwahwahwahwahwah” and as I was talking I was reading the pained expressions on their faces and imagining their inner voices screaming “I wish she’d shut up.” “She doesn’t get it” “La la la… I’m not listening…I’m not listening”…

And  then I remembered. “Wait. I know better. I’m just letting fatigue get to me. I know that lectures about teamwork and impassioned discussions with students about responsibility in the hallway won’t really help them get any work done. Talks won’t make the kids suddenly able to come to the event or magically induce a focused work trance. They won’t make the problems that low-income school students bring in the classroom suddenly disappear. They just makes everyone unhappy and tired in the moment and who can work where unhappiness abounds, and don’t frustration and unhappiness work perfectly as another excuse not to get any work done?

And so, in a moment of desperate inspiration, I called the boys into a circle at the front of the room and I challenged them to…

A fake ninja fight. 

Yep. That’s what I did. The rules were simple. No touching anyone. You just had to amaze the team with a devastating ninja move which would ideally be accompanied by some kind of brain-breaking noise that would fill the rest of us with terror and perhaps make us kneel in awe to the mighty-ness of your ninja power.

I thought for sure this plan would backfire, the problems and frustration were too big for a silly fake ninja fight. The students’ resolve to communicate their sorrow and frustration on this particular day would surely win this round… but then, one of them stepped forward and tore into our souls with some mighty ninja fury. AND. Inspired by his courage, I demonstrated my fiercest move… “the tear-the- heart-out-take-a-taste-spit-it-out-on-the-floor-and-squish-it” move. AND SO. The next boy hurled a ninja throwing star directly at me which sent me sailing to the floor clutching the point of entry in my wounded chest. KABLAM. Which was followed by another student’s best slow-motion spin kick with accompanying slow-mo audio “Hiiiiiiiii—-yaaaaaaaaaahhhhh”.

And then we were laughing.

And then we were working. 

I don’t know what inspired this particular course of action in this particular moment of my teaching career. It wasn’t in any lesson plan and I’d never done it before with students. I do sometimes make my husband laugh with my super stylin’ ninja moves when I need to express my frustration at the world, and I did fight my three-year-old “nephew” from Uruguay in a fake ninja fight at my wedding…
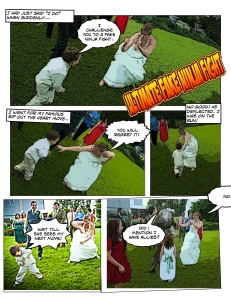
But I don’t know why today I decided this was something to do in a classroom in front of human beings that function outside my normal circle of weirdos and family. All I know, if you don’t mind my saying so… is that it was kind of a genius move on my part. It fixed everything, well… at least long enough for the boys to get some work done.

I know. It didn’t solve their larger life problems. It didn’t solve mine either. But it helped us to stop, to breathe, to play, to connect, to reset and blow off some steam and then, to get back to the work we needed to get done.

It felt great to let the boys be boys for a moment and I think they enjoyed and needed the opportunity to do so.

If you have the right classroom environment and the right group of kids (because we all know fake ninja fights might not be the best plan in every classroom), give it a try sometime. You can borrow my secret move if you want. Just remember. The key to making it especially awesome is the part where you taste the heart, right before throwing it to the ground and squishing it.

😉

Making School Work for Students

7 Oct

In my last post, I mentioned the disappointment I experienced when only three of the nine girls I recruited for the after school FLL program decided to join the club. My disappointment was compounded when, after speaking to the entire middle school, only three boys signed up for the program.

It didn’t make sense. My presentation went well. The kids were actively listening. They were clearly interested. They appeared super curious, so I couldn’t understand why, after such a positive reception, there were only three names on the club sign-up sheet.

Staring down at the empty spaces on the sheet, I felt defeated. Quite honestly… I felt a little embarrassed too. I had been pushing this robotics club for two years; I had not only registered two FLL teams for the season, but I had also agreed to collaborate with the University of Pennsylvania to host an FLL Qualifying Event. What was I going to say to them… “I know we agreed to host the FLL event, but as it turns out I’m completely useless when it comes to recruiting students for after school clubs.” Ugh. My stomach hurt.

I gave myself a few hours to just be disappointed and to get to the point where I could “accept what is so”. I pulled it together and started to think through the situation. I knew there were students who wanted this club on campus. They had been asking for it. So where were they now?

Obviously, I was doing something wrong. There was something about what I was offering that didn’t work for the students.

Continue reading

The Ugly Side of Progress: Telling the Whole Story

14 Sep

When I started this blog, I wanted to “create an archive of our efforts. A timeline, map and story that tracks our progress from our start at “no STEM program” to an “award winning STEM program”.

I realized recently that I have been sharing a pretty biased version of our school’s story all along. I tend to share when I’m excited and when I’m experiencing success.  I’m less likely to share when I’m upset and butting my head against failure and frustration.

I haven’t blogged about the endless hours I spent trying to put together budgets or researching programs and curriculum to include in our STEM grant proposals. I definitely haven’t written about the overwhelming feelings of inadequacy that I had while trying to piece that information together. I haven’t written about the rough days with the kids or the administrators when I felt like a poser, under-qualified for the tasks I was tackling, just doing my best to stay two steps ahead of the game. You get the picture.

I keep the ugly stuff to myself, but I shouldn’t, and here’s why.

Continue reading

Two-wheeled Bot. My first attempt at model instructions.

7 Sep

Two-wheeled Bot Instructions

This past August 15th and 16th, educators from around Philadelphia came together for two days of free professional development provided by the GRASP Outreach program at U Penn SEAS. Many of the participants in attendance, myself included, will be rookie coaches for this year’s FLL season and the two-day workshop was designed to be a bit like a boot camp to get us up to speed and to impart the tips and tools we will need to have a successful first season.

The first task our trainers charged us with was to build a simple a simple 2-wheeled robot. One of the challenges the group faced in building the robots was that we did not have a blue print or set of instructions in front of us. (I think they were having a difficult time finding them. I’m not sure.) Instead, our trainer talked us through the assembly one part at a time. This, as you can imagine if you have built an NXT robot before, was challenging. Keeping everyone moving at the same pace was nearly impossible.

As we built our bots piece by piece from oral instructions, I started to wonder how in the world I would be able to recreate the robot once I was back at school. So, I backed up a few steps, opened my laptop and started to capture each step with the webcam. Soon, people around me were asking me to post the pictures or send them to them.

Well… I got back to campus and sat down to build the robot using my pictures and the pieces from an NXT kit, and I quickly realized that there were multiple problems.

Firstly, the angle at which I originally shot many of the steps made it pretty difficult to figure out what was going on.

Secondly, while the model was simple enough for teachers to build and it required few parts in general, it required more parts than are available in a single NXT kit. To build this model, a teacher would either need to pull more pieces from additional kits, or have surplus materials available. This assumes teachers have more than one kit to work with, which is often not the case.

“Well… that’s no good” I thought, and so I started to redesign the bot using only parts from a single kit and documenting the process as I went.

So, for those of you have been waiting for the original photos… I apologize for not posting them sooner. Hopefully, you’ll find the new photos are an improvement and that the photos and steps clearer. The robot is very similar to the one we built with just a few swapped parts to ensure it can be built from a single NXT Mindstorms kit.

Let me know what you think of the model instructions I put together. It was my first attempt and I’m curious to see how easy or difficult they are to follow. Please let me know!

Why STEM? An idealist rant from my inner hippie voice.

4 Sep

Tonight after reading a post by Kim Crawford, titled “Don’t Forget to Show Them Who You Really Are” I started to think about how I present myself in this blog. By nature, I do not struggle with vulnerability. Unlike Kim, I’m more likely to need to build a few walls then take them down. But her post got me thinking. Do I ever really share the part of me that is a peace-loving, wildly idealistic optimist that just wants the world to stop making itself so sick, or do I keep that part of me hidden so as not to come off as an “anti-intellectual”?

So, I’ve decided to share my completely self-serving idealist hippie reasons for pushing STEM in schools. I’m going to try not to self-censor or over edit. If it’s a little jumbled, please be gentle. 

In the media and the white papers, improving STEM curriculum in schools is promoted as the means by which we will ensure our national security and create the pipeline of skilled, technical workers that will be needed to keep our high-tech world running and progressing. While I don’t undervalue the importance national security or a skilled work force, these are not my motivators for pushing STEM in schools.

My desire to see STEM improve in schools is based in my desire to help students develop the skills I believe they will need in order to create the world I want to live in and that they will have to live in. What can I say, it’s sounds cheesy when I say it out loud, but there it is, my reason for pushing STEM in schools. 

I want to live in a world where, when a problem or obstacle presents itself, people attempt to solve it, and don’t immediately look to someone else to fix it or blame someone else when it doen’s get fixed. I want to live where people from every race, sex, religion, and age can empathize with one another and collaborate to create positive change.  I want to live in a world where people who think about their actions and the impact their actions will have on others drive innovation and progress. I’m not naive. It won’t happen in my lifetime, but I can still want it and I can still take steps to try to make it happen.

I sometimes judge myself harshly. I should be championing the efforts to keep music, art and physical fitness in schools. They are equally important and they are the reason I stayed in school. I guess I see the current focus on getting STEM into schools as an opportunity to keep these activities from disappearing altogether for now. Art with an emphasis on applied math and technology. You can can make that happen. Physical activity with an emphasis on applied physics, technology and engineering. You can make that happen. With STEM as the buzzword of the moment, you can say, “Don’t worry! It’s not an art lesson, it’s a STEM lesson” and no one will question.

I’m technically an advocate for SHTEMPALM… but that sounds a little silly, right?

I’m getting a little punchy and it’s a little late, so before I back out and save this as a draft that never gets posted, I think it’s time to sum it up. 

I want to make sure that students engage in problem-solving and critical thinking especially around issues that are relevant in their lives. I want them to think about problems and to work together to find and design solutions. I want them to have the information and the skill sets they need to make their solutions realities. I want them to learn to fail with grace and to bask in the intrinsic joy that comes with success. I want them to build a beautiful world for themselves.

Peace. 😉

Feature: A Teacher’s Top eGFI Tips

31 Aug

Check it out! I was interviewed for the latest “Engineering Go For It” teacher newsletter.

As you may already know if you follow this blog, I love eGFI’s educator resources, so when contacted by one of their writers for an interview, I jumped at the chance to share how I use them!

If you are implementing a STEM program at your school, their site is a must!

The Wider World of WeDo: Five Must See Models

28 Aug

Despite the LEGO WeDo kit’s simplicity, people all over are finding innovative ways to take WeDo model building to the next level. I thought it would be fun to showcase a few videos that feature the potential of the WeDo kit.

1. The WeDo Cable Car

Stefan Bracher shared his web resource with me in a comment on my home page. His site, which he will hopefully continue to expand, contains videos and instructions for unique WeDo and NXT models.  Detailed instructions on how to build the cable car model featured in the video can be found on his site.


2. The WeDo Drawbridge

This video posted by wedouser on his youtube channel highlights the intersection of imagination, art, and engineering as the child in the video walks a LEGO man up to the edge of the water he has drawn and waits for the drawbridge to lower so he can safely pass. Notice the printer paper he’s used to draw his water… brings back memories. 😉 


3. The WeDo Conveyor Belt

This conveyor belt model posted on youtube by user sanmishr uses few pieces that are not included in the WeDo kit, but none that are hard to come by. I can easily imagine tying this model into a social studies lesson on Ford and the assembly line.


4. The WeDo Windmill

One of the things I love about this video posted by , is that despite the fact I do not speak Chinese (I think it’s Chinese), I am able to appreciate the interaction between the child and adult in the video and understand the child as she describes and demonstrates how the model is working. (One of my favorite moments from teaching the Grade 1 unit last year, was listening as the children easily articulated how models worked during their final assessments.) This terrific windmill model could easily be incorporated into a green energy lesson.


5. The WeDo Shuttle Launcher 

This video posted on youtube by user sakiv features a boy explaining how his creatively designed shuttle launcher works.


Do you have an innovative LEGO WeDo design you’d like featured here or that you’d like to share? Post a comment and tell us about it!

ISTE 2011: LEGO Workshops (Post 2 of 2)

26 Jul

ISTE 2011 Post #2: Notes: Working my way through my conference notes. Trying to get them out of the brain and onto the page. 

LEGO Sponsored Workshop: Revolution through Serious Play and WeDo 

I have only one big gripe as a newbie at ISTE this year; the online program was a pain in the neck to navigate. Searching by keywords brought up a few workshops and presentations, but completely ignored others. “Sponsor Activities” weren’t listed under “Presentations by Time” and… well… I won’t waste your time venting about the schedule. The short of it is that I paid for a half-day NXT workshop, when I could have attended a free sponsored workshop on the same topic by the same presenter, and I almost missed out on the opportunity to attend this LEGO WeDo workshop that I completely lucked into when I happened to walk by and I recognized the familiar kits.

Part 1: Serious Play

I slipped into the room a few minutes late and took an empty seat. We sat in pairs at workstations, each containing a WeDo Kit and a laptop. While I was interested in hearing what the presenter, Kathy Holberg, would share about WeDo, I was also interested in:

1) Connecting with other educators who are using WeDo in the K-6 classroom

2) Learning about “LEGO Serious Play“, something I had read about, but had never seen.

Kathy started by giving us this brief overview of LEGO Serious Play (LSP). LSP is used as a training tool or training methodology in a variety of industries and businesses, as well as in schools, for purposes such as team building, fostering out-of-box thinking, encouraging the expression of feelings, ice-breaking activities, making connections, aiding awareness of others’ feelings, and developing listening skills. It is also used to improve communication skills, logical thinking, and creative thinking. It is a vehicle for exploring metaphoric language and thoughts.

After her overview, Kathy gave each participant a bag of LEGO Serious Play parts and this prompt:

Construct a model that represents a hands-on STEM lesson in your classroom. Try to use all the pieces.

I looked at the meager pile of random pieces lying on the table in front of me, and thought “Really? Do that? With these?” I looked over at my neighbor; she appeared equally hesitant. Regardless, we set to work clicking and snapping pieces together.  What I found interesting, is that due to the limited number of pieces to choose from, I was quickly forced to let go of any desire to create a specific or concrete representation of an object or idea and to instead embrace my creativity and explore which pieces I could use to represent an object or symbolize an idea. It got easier and easier.

After five minutes, Kathy stopped us and asked us to turn to our neighbor to describe our models regardless of where we were in the building stage. This was my model…

…and here is my partner, LeRhonda’s (@lgreats) model.

I love that even with so few pieces to work with, we were both still able to create and share something unique regarding our ideas on STEM lessons in the classroom.

According to Kathy, a teacher’s, or facilitator’s, main role during a Serious Play build, is to ask questions and move around the room without introducing any type of bias into the building effort. For example, a facilitator should not say “Good job, Tom”, because it could create the impression that there is a “good way” or a “bad way” to complete the activity. The goal is to have everyone be comfortable using the LEGO blocks as a vehicle to explore or express an idea, a thought, or a feeling without worrying about the consequences of not doing it well, or right, or as good as the next guy.

Kathy made sure to clarify that the LEGO Serious Play methodology required specific training in regards to how to“properly” write a challenge question, set the stage for using LSP (LEGO Serious Play), work with students when they are telling their stories, and  connect the activities to student learning, but I would venture to say that any teacher with a bunch of LEGO bricks and a good grasp on inquiry-based, constructivist instruction could engage a classroom in some “LEGO Serious Play”. 

That’s not to say that teachers wouldn’t benefit from a formal LSP training or from having access to specific LSP kits. It’s more to say that the use of LEGOs or other manipulatives to explore thoughts, ideas, and feelings is something that could be done with little to no additional cost to a school that already has access to LEGOs, granted a teacher did a little research to understand the core concepts involved in the LSP model.

Part 2: LEGO WeDo

Kathy next introduced us to the new LEGO Education WeDo Robotics Extension Activity Bundle. Basically, LEGO took the same basic 12 builds for the WeDo Kits and then created a new curriculum set to connect the builds with subject matter from PE, language arts, and social studies. I’m not too interested in purchasing this extension pack. I tend to naturally make cross-curricular connections when using the kits. For teachers who prefer to teach from a written curriculum, or for new teachers who may benefit from the structure of a pre-designed curriculum, it will be great. For those of us who nerd out on the creative aspects of unit planning and lesson writing, it may be less appealing.

The rest of the workshop gave teachers time to explore the kits and build a model.

Here are few WeDo tips Kathy shared: 

1.Use “fun foam” to cover the WeDo kit lids.  Kathy likes using fun foam on the lids so that students don’t get distracted by the images on the lids, so they can use the lid as a building mat since the LEGOs don’t bounce off the fun foam, and finally so the lid can be used as a tray to display the students’ builds.

2. Create an “NXT” parts diagram for organization. Kathy creates a system for arranging the kits and then takes a picture for the kids to help them stay organized. (I thought about doing this when I initially started to work with the kits, but decided not to for the sake of time. I think it’s a great idea for teachers who are uber-organizers.) 

My favorite tip… Use “Alt-tab” to quickly see the desktop when working in WeDo. (If you are familiar with the WeDo software interface then you know it defaults to a full-screen view. This tip will come in handy for sure.)

A Fun Fact: Black axels are even. Grey axels are odd. (I never noticed that.)

During the workshop, Kathy was kind enough to give me the opportunity to plug my blog and to invite teachers using the WeDo kits  to send ideas, lessons, or reflections that I could include in a post or put up as a “guest blogger post”.  Although a few people expressed interested in sharing or posting, I haven’t heard from anyone yet. The offer stands! If you want to get something out there about elementary robotics, but don’t want to commit to your own blog… just let me know.

By the way… we got to keep our LSP kits and we got these sweet keychains. Pretty cool, huh? 😉

ISTE 2011 LEGO Workshops (Post 1 of 2)

15 Jul

I’ve been wanting to post my notes from the LEGO workshops I attended at ISTE 2011, but I’ve been procrastinating. I need to post them so that I can make room in my brain for some new ideas. So here goes!

ISTE 2011 Post #1: Notes from Sunday June 26, 2011…

Introduction to Classroom Robotics: Computer Science in Motion!

The workshop room was full of people seated behind workstations. Each workstation had a LEGO NXT kit, a pre-built Domabot with a few sensors attached, and a computer with NXT-G software.

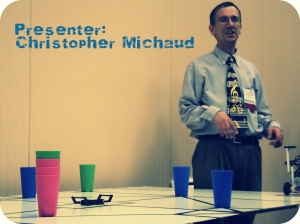
Our presenter was Christopher Michaud, a Music Teacher at  Nebo Elementary School in Dallas, Georgia, and a graduate from Temple University’s Music program. (Woot! Philadelphia in the house.) He taught himself to program, and now in addition to teaching music, he teaches a computer science curriculum for grades 3-5. He focuses mainly on Open Office/ Alice/ Python/ and Robotics and has a terrific website with loads of great resources. (I couldn’t help but secretly love the fact that his background is in music, since my undergrad was a music technology degree. music + math + curiosity = awesome life!)

Chris started the workshop with a Powerpoint presentation in which he provided us with a brief overview of his goals for the workshop: Build, Program, Experiment, Apply, and listed a few of his reasons for teaching robotics at the elementary level, including my favorite, “Robots are cool.”  (He has headier reasons listed in the presentation that will make for stronger plugs when trying to sell a robotics program to your administration, so  I encourage you to check it out.)

The remainder of the Powerpoint presentation was a bit of NXT Robotics 101, which sensors did what and the like, and was a perfect introduction to NXT robotics.

Within just a few minutes of starting the first workshop activity, getting the domabot to drive in a square, I, and the woman next to me, realized that this was perhaps a true beginners workshop. (As in, many people in the room had never even touched an NXT kit before. I guess it’s time for me to bump my status up to advanced beginner.) My partner was open to going off script to explore some of the features of NXT-G that we were curious about and so we started messing about, clicking on buttons and pulling down menus.

Chris came over and asked how we were doing. We confessed and told him we had gone rogue.

Lucky for us, he was not at all offended and was an excellent differentiator of instruction and he immediately found us a task that would both challenge us and highlight a few new features of the software that we were not familiar with. We worked on “Simple Pi Challenge 1” and “Simple Pi Challenge 2”,  two worksheets which not only provided us with an excellent opportunity to practice writing formulas within the NXT-G software, but which also gave us great take-away lesson to use in the classroom. It provides a perfect opportunity for students to see “Pi in action”.

Once we had worked our way through that challenge, we quickly discussed what else we’d like to get out of the remaining time.

We both admitted that we had no idea how to use… DATA WIRES.

Yep. It’s true. I’ve been avoiding them. I don’t why. I think it’s because I learn so many things just by messing around or through trial and error. But when I approached data wires in this manner… there was a whole lot of “error” at the end of every “trial”. Chris was great, and he broke datawires down for us and helped make them seem at least approachable. (I’ll try to post a simple example of the use of datawires at some point for anyone else who is hesitating on getting a handle on them. Or maybe someone has a great intro resource they could suggest…)

Here are few helpful suggestions Chris made for teachers who are about to take on robotics…

1. Start with a robot built. “Kids understand build. Programming is more difficult.” The domabot is great example of a robot you can easily have ready for students to work with.

2 .Organize the room with computers on the perimeter and workspace in the middle. Have a place  in the room where it is possible to have students with empty hands.

Here’s some new vocabulary for neophyte robot programmers:

Swing turn: 1 wheel turns 1 wheel doesn’t. (Think “pivot” on a basketball court.)

Point turn: 1 wheel turns forward, the other goes in reverse. (Think… I don’t know… any ideas?)

To be honest. That’s all I got for you. Those are my notes. I know. Not very impressive. Which might be why I was procrastinating. But at least there out of my head and on the page. 😉

Thanks Chris! I finally learned to use variables, custom blocks, data wires, and the formula review in NXT-G. It’s about time. My students better get ready… next year will be a whole new ball game!

LEGO WeDo Vehicle Challenge: Using WeDo kits with older students

20 Jun

The LEGO WeDo kit is designed and marketed for early elementary children. It’s so basic that even a first grader can use it, but be careful not to write this kit off as a “just-for-the-little-kids” kit too quickly.

This year, one of my favorite mini-lessons with the 7-9th grade students in the after school STEM club was this “WeDo Vehicle Challenge”:

Design a WeDo vehicle that has either 2, 3, or 4 wheels. Use only the pieces in the Wedo kit. The vehicle does not need to have steering, but it must be able to drive forward and in reverse. Innovation is encouraged. You have two class periods (1 hour each). We’ll present at the end of the second.

The kids usually take a look at the WeDo kit and presume the challenge will not be much of a challenge. Once the students get started, it isn’t long at all before they realize what makes it challenging; there is only one motor, the motor is fairly heavy relative to the parts, and that the axle sticks straight out of the center of the motor. Hmmm….

I’m guessing the challenge is probably easier for students that have prior experience working with LEGO kits and robotics; I’m not sure. (Let me know if you try it.) All my students were new to working with the NXT kits when I tried the WeDo lesson. I wanted to see how they worked when asked to think out of the box and to be creative. Following a blueprint is great for developing spatial skills and following instructions, but it doesn’t necessarily foster innovative thinking.  I found that forcing the students to work with the limited parts of the WeDo kit encouraged them to be persistent, to attempt multiple solutions, to redesign and improve, and to work together.

I’m curious if other teachers and after-school educators have tried using the WeDo kits with older students? Let me know!

Here are a few examples of our WeDo vehicle designs if you are curious… (The kids filmed the clips.)